Aluminum can be a challenging material to cut on a CNC router system as there are a lot of factors that come in to play, including tool selection, feed rate, RPM, mounting your material, and chip clearance to name a few. In this article, I will cover each and walk you through the optimal settings that we found work best on a STEPCRAFT CNC.
ALUMINUM GRADES
Let’s start with types of Aluminum and which works best on a CNC Router. There are common types of aluminum that I have come across that will discuss here: 5052, 6061 and 7075.
7075 Aluminum is very hard and is commonly used in structural applications. While you can cut it with a STEPCRAFT, you are limited by taking very shallow cut depths and running very slow. It is not the most favorable grade of aluminum for CNC router systems. It costs more and it not as friendly to work with for typical hobby applications.
5051 Aluminum is just the opposite. It is a very high strength aluminum that is used in marine applications. It is often used when the part needs to be drawn into molds or plugs to make complicated shapes. Because of that, it tends to be much softer and can prove to be very difficult to machine on a CNC router, even when using a single flute end mill. When working with 5052, you will often find that the aluminum gums up on the tip of the tool, thus welding itself to the bit causing it to chatter and eventually break. In order to work successfully with 5052 you need to have some kind of a lubrication device, such as a mist lubricator. Since most CNC Routers are open frame without shields to prevent liquid spray, it is not recommended to use a lot of lubrication. 5052 does tend to be less expensive, however, the money you save in material cost you will quickly make up in a lubrication system and/or broken bits.
That leave us with 6061, which happens to be the most common and easiest to to work with grade of aluminum for use with STEPCRAFT CNC systems and other CNC routers as well. You can find 6061 aluminum on many online stores as well as EBay and Amazon. You can buy it in sheets, plates or bars, making it easy to find the stock that is best for your job. For the purpose of the rest of this article as well as any reference to working with Aluminum on a STEPCRAFT, 6061 is the grade that we are talking about.
CUTTING TOOLS
The cutting tools that we use on a CNC router system can be referred to as “router bits” or “end mills”. When working with Aluminum, we always use end mills. They come in many styles, sizes and number of flutes. Typically the higher the number of flutes, the better the finish quality. This especially holds true on a purpose-built CNC Mill, such as a Haas or Tormach. These machines are very heavy-duty and are designed to cut metals, including steel. They tend to have a much slower working RPM, often times less than 4,000 RPM. CNC routers, like the STEPCRAFT, have spindles that run much faster, often from 10,000-30,000 RPM. Because of this, it is less common to run multi-flute end mills on a router. More on this later in this article.
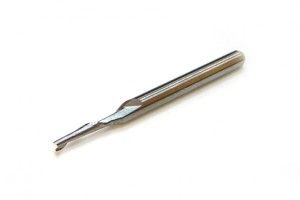 This is a single flute carbide end mill.
Types of End Mills – End mills are commonly made of either high-speed steel (HSS) or Carbide. Don’t let the name fool you into thinking that we must require HSS tools because our RPMs are so much faster. HSS tools are designed to work best with lower RPM milling machines and therefore are not a good choice for working with metals on a CNC router. Carbide end mills are the material of choice for our tooling and they hold up and perform much better at the higher RPMs.
Number of Flutes – If you were to look at a job that would be setup on a CNC Milling Machine, you might find that the correct feed and speed from a purpose-made calculator will tell you that you can use an .125″ end mill with 4 flutes spinning at 3,850 RPM to obtain the optimal performance. Our CNC routers can not spin that slowly so to compensate for it, we use end mills with less flutes. At 3,850 RPM, in one rotation of the tool there are four separate cuts being made. If we put that same tool on a CNC router running 12,000 RPM, we would actually be making 4 times the number of cuts per a given feed rate. This will cause premature wear of the tool, and overheating which can cause bits to snap. Now if we switched to a single flute end mill, running at 12,000 RPM, we would be making the same number of cuts per given feed rate as the mill running 3,850 RPM, and we would expect the same quality finish. So the rule of thumb with aluminum on a STEPCRAFT is 1 or 2 flute end mills.
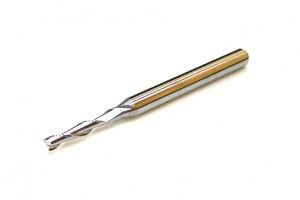 This is a two flute carbide end mill.
SECURING YOUR ALUMINUM
STEPCRAFT systems come with a solid Formica-type work surface as a standard part of the machine. When working with aluminum it is very important to secure your material as solid as possible. While you can simply lay an aluminum plate on the table and then use the cross clamps to secure it, using a T-Slot table will provide you with a much more solid work surface and give you a lot of flexibility when it comes to securing your materials. Aluminum plates can work fine on the stock table, but if you want to work with Aluminum bar stock, you will need to install some sort of a vice on your machine and the T-Slot is perfect for that. My personal preference is to use a T-slot whenever I work with Aluminum because the more secure I can clamp my material down, the less chance there is for vibration which can affect the cut quality and can even cause tools to break.
Without A T-Slot Table – If you would like to cut aluminum and don’t have a T-Slot, I suggest getting a piece of 1/4″ (.025″) acrylic or plexiglass and use it as your sacrificial (or spoil board) placed under the aluminum plate. You can then use the cross clamps that come with the STEPCRAFT to secure the bolts, clamping the aluminum to the spoil board.
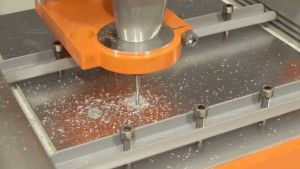
Here is an aluminum plate being held down with the STEPCRAFT cross clamps that are included with every machine.
With a T-Slot Table – If you have a T-Slot table you can invest in many different types of clamps to secure your material to the table. Simply Google “T-Slot clamps” and you will see thousands. You will need either T-slot nuts or bolts that will fit in the channel of the table. Keep in mind that the channel in the table is 10mm wide with a 6mm opening, so most bolts and nuts designed in inches, will not fit – they will most likely be too large. You can always buy them and grind them down to fit, or as an option, STEPCRAFT will be coming out with our own T-Slot Clamps in the near future.
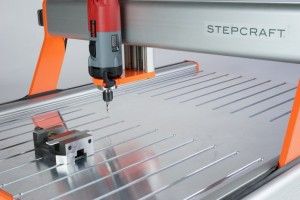
This is the STEPCRAFT T-slot table with a PM60 Vice installed.
Spoil Board – The spoil board is very important if you intend to cut all the way through your material. It will allow you to cut about .010″ deeper than the material thickness which will 1) ensure that you cut all the way though the work piece even if there is some small deviation in the material and 2) ensure that you have a clean cut on the top and bottom of the material. When working with aluminum I prefer to use acrylic as my spoil board. It is usually always machined true were wood is not. When you are working in thousandths of an inch, any deviation in the spoil board will transfer into the work piece. If you have to use wood, MDF would be my choice. In the worse case you can always use a second piece of aluminum and that will become your universal spoil board from now on.
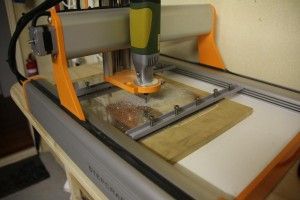
Here is a spoilboard that a customer did using a piece of wood
SPINDLES
My personal preference for spindles when working with Aluminum is the STEPCRAFT HF-500 computer controlled spindle and the KRESS 800W spindle. You can use the Dewalt, which will work fine as well, but I would not use a Dremel for aluminum as it does not have the durability to be used with harder material in a CNC like this. The HF-500 is a nice option because the RPM is controlled and maintained by the software, giving you a lot of control to keep within your optimum RPM range. The Kress, however is a manual spindle that you have to turn on and off manually and there is a dial to adjust the RPM. The Kress is more powerful at 800 watts whereas the HF-500 is 500 watts, but it is also a AC motor system and the HF-500 is a DC Brushless motor system. Both have their advantages. There is a sizable difference in price with the HF-500 at $679.00 and the Kress at $269. My rule of thumb is that if you are going to be working with aluminum more than 35% of the time, choose the HF-500. If you are going to only do aluminum every so often and wood is a primary material, then go with the Kress.
CHIP EVACUATION
If you follow any advice in this article, please follow this… For the best results when running aluminum on a STEPCRAFT, you MUST clear the chips from the tool. This is especially important when you are making deep profile cuts. When chips fall into a channel that you are cutting and they pile up in front of the tool, you run the rick of re-cutting the chips as you are cutting your material. When this happens you will hear a lot of chatter, which, at the very least will ruin your finish, but will most likely cause the chips to weld to the tip of the tool and eventually snap the bit.
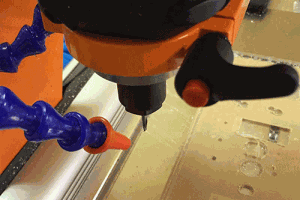
Here is an air nozzle connected to the STEPCRAFT to blow the chips away from the cutting tool
You can use a vacuum system, such as the STEPCRAFT Exhaust Adapter which will work for surface chips, but unless you have a very powerful vacuum, it will not always pull chips out of deeper channels. The best solution is to use a flexible air nozzle that is connected to an air compressor. Keep a low, constant flow of air pressure directed at the bit. This will keep the bit cool and blow the chips out of the way before they have a chance to pile up. This tip can mean the difference between a very nice looking final piece and broken bits, poor finish quality and an overall unpleasant experience.
STEPCRAFT systems come with a solid Formica-type work surface as a standard part of the machine. When working with aluminum it is very important to secure your material as solid as possible. While you can simply lay an aluminum plate on the table and then use the cross clamps to secure it, using a T-Slot table will provide you with a much more solid work surface and give you a lot of flexibility when it comes to securing your materials. Aluminum plates can work fine on the stock table, but if you want to work with Aluminum bar stock, you will need to install some sort of a vice on your machine and the T-Slot is perfect for that. My personal preference is to use a T-slot whenever I work with Aluminum because the more secure I can clamp my material down, the less chance there is for vibration which can affect the cut quality and can even cause tools to break.
Without A T-Slot Table – If you would like to cut aluminum and don’t have a T-Slot, I suggest getting a piece of 1/4″ (.025″) acrylic or plexiglass and use it as your sacrificial (or spoil board) placed under the aluminum plate. You can then use the cross clamps that come with the STEPCRAFT to secure the bolts, clamping the aluminum to the spoil board.

Here is an aluminum plate being held down with the STEPCRAFT cross clamps that are included with every machine.
With a T-Slot Table – If you have a T-Slot table you can invest in many different types of clamps to secure your material to the table. Simply Google “T-Slot clamps” and you will see thousands. You will need either T-slot nuts or bolts that will fit in the channel of the table. Keep in mind that the channel in the table is 10mm wide with a 6mm opening, so most bolts and nuts designed in inches, will not fit – they will most likely be too large. You can always buy them and grind them down to fit, or as an option, STEPCRAFT will be coming out with our own T-Slot Clamps in the near future.

This is the STEPCRAFT T-slot table with a PM60 Vice installed.
Spoil Board – The spoil board is very important if you intend to cut all the way through your material. It will allow you to cut about .010″ deeper than the material thickness which will 1) ensure that you cut all the way though the work piece even if there is some small deviation in the material and 2) ensure that you have a clean cut on the top and bottom of the material. When working with aluminum I prefer to use acrylic as my spoil board. It is usually always machined true were wood is not. When you are working in thousandths of an inch, any deviation in the spoil board will transfer into the work piece. If you have to use wood, MDF would be my choice. In the worse case you can always use a second piece of aluminum and that will become your universal spoil board from now on.

Here is a spoilboard that a customer did using a piece of wood
SPINDLES
My personal preference for spindles when working with Aluminum is the STEPCRAFT HF-500 computer controlled spindle and the KRESS 800W spindle. You can use the Dewalt, which will work fine as well, but I would not use a Dremel for aluminum as it does not have the durability to be used with harder material in a CNC like this. The HF-500 is a nice option because the RPM is controlled and maintained by the software, giving you a lot of control to keep within your optimum RPM range. The Kress, however is a manual spindle that you have to turn on and off manually and there is a dial to adjust the RPM. The Kress is more powerful at 800 watts whereas the HF-500 is 500 watts, but it is also a AC motor system and the HF-500 is a DC Brushless motor system. Both have their advantages. There is a sizable difference in price with the HF-500 at $679.00 and the Kress at $269. My rule of thumb is that if you are going to be working with aluminum more than 35% of the time, choose the HF-500. If you are going to only do aluminum every so often and wood is a primary material, then go with the Kress.
CHIP EVACUATION
If you follow any advice in this article, please follow this… For the best results when running aluminum on a STEPCRAFT, you MUST clear the chips from the tool. This is especially important when you are making deep profile cuts. When chips fall into a channel that you are cutting and they pile up in front of the tool, you run the rick of re-cutting the chips as you are cutting your material. When this happens you will hear a lot of chatter, which, at the very least will ruin your finish, but will most likely cause the chips to weld to the tip of the tool and eventually snap the bit.

Here is an air nozzle connected to the STEPCRAFT to blow the chips away from the cutting tool
You can use a vacuum system, such as the STEPCRAFT Exhaust Adapter which will work for surface chips, but unless you have a very powerful vacuum, it will not always pull chips out of deeper channels. The best solution is to use a flexible air nozzle that is connected to an air compressor. Keep a low, constant flow of air pressure directed at the bit. This will keep the bit cool and blow the chips out of the way before they have a chance to pile up. This tip can mean the difference between a very nice looking final piece and broken bits, poor finish quality and an overall unpleasant experience.
SOFTWARE SETTNGS
After a lot of testing we have found the best settings for the STEPCRAFT are as follows: (Plunge Rates for all are set to 5mm/sec and I use a 1″ ramp)
KRESS SPINDLE
1/8″ (0.125″) Single Flute End Mill – 20mm/sec feed rate, .020″ pass depth, around 13,000 RPM (number 4 setting on the dial)
1/16″ (0.0625″) Two Flute End Mill – 15mm/sec feed rate, .015″ pass depth, 13,000 RPM (number 4 setting on the dial)
HF-500 SPINDLE
1/8″ (0.125″) Single Flute End Mill – 25mm/sec feed rate, .015″ pass depth, around 13,000 RPM
1/16″ (0.0625″) Two Flute End Mill – 15mm/sec feed rate, .015″ pass depth, 13,000 RPM
NOTE: We will be adding more as we test more tooling. If you have results to share, please email us at info@stepcraft.us with your results.
In the Vectric programs, you will select a tool from the tool database. The screen will look like this:
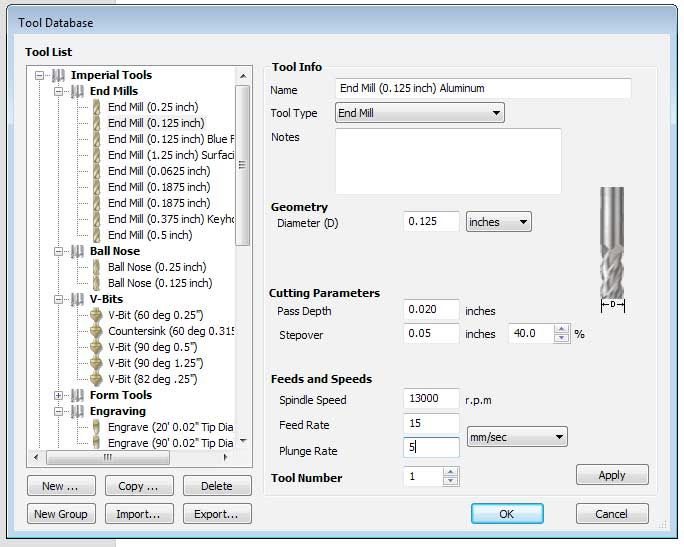

Optimal Settings for Cutting Aluminum on a STEPCRAFT CNC System